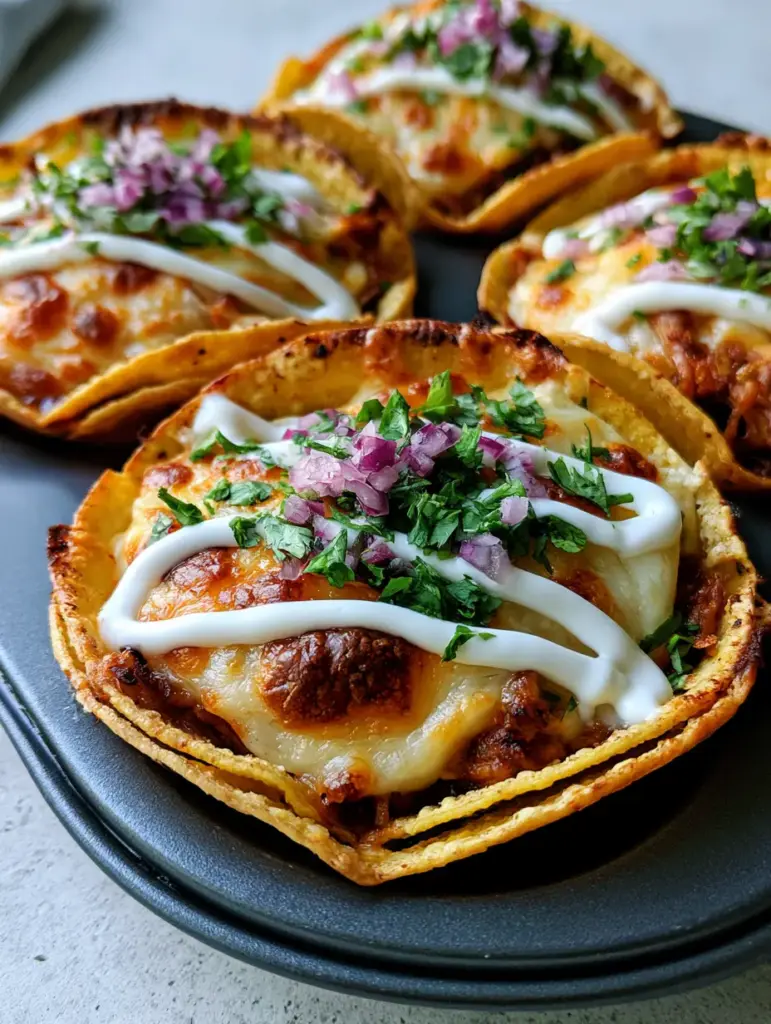
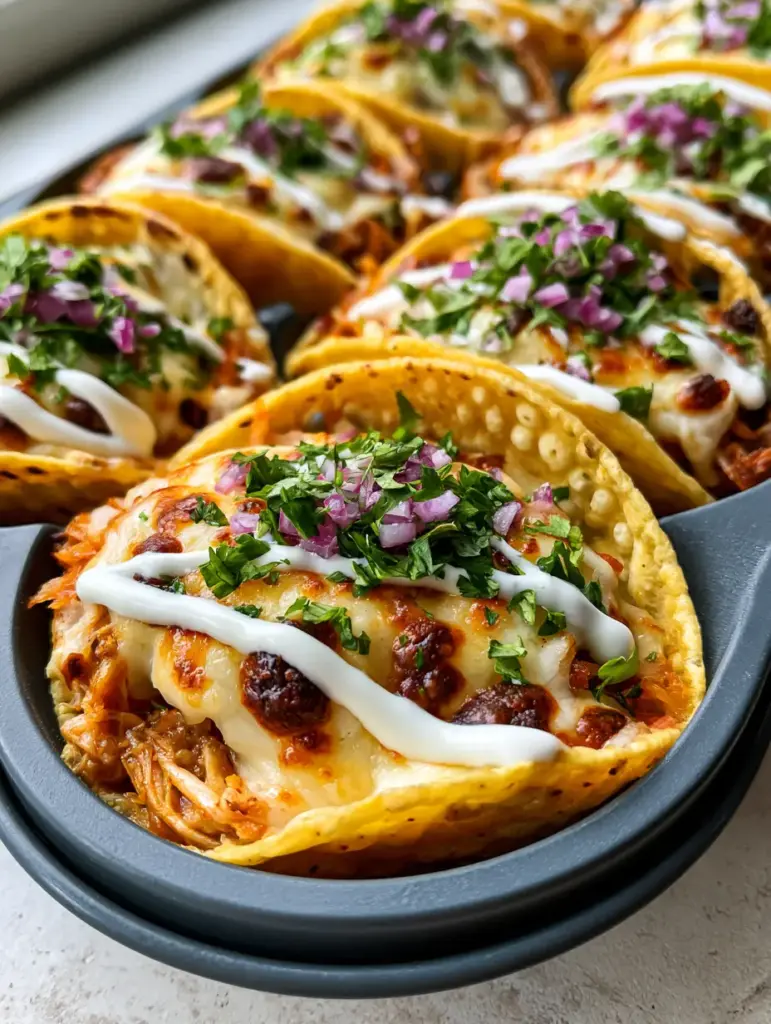
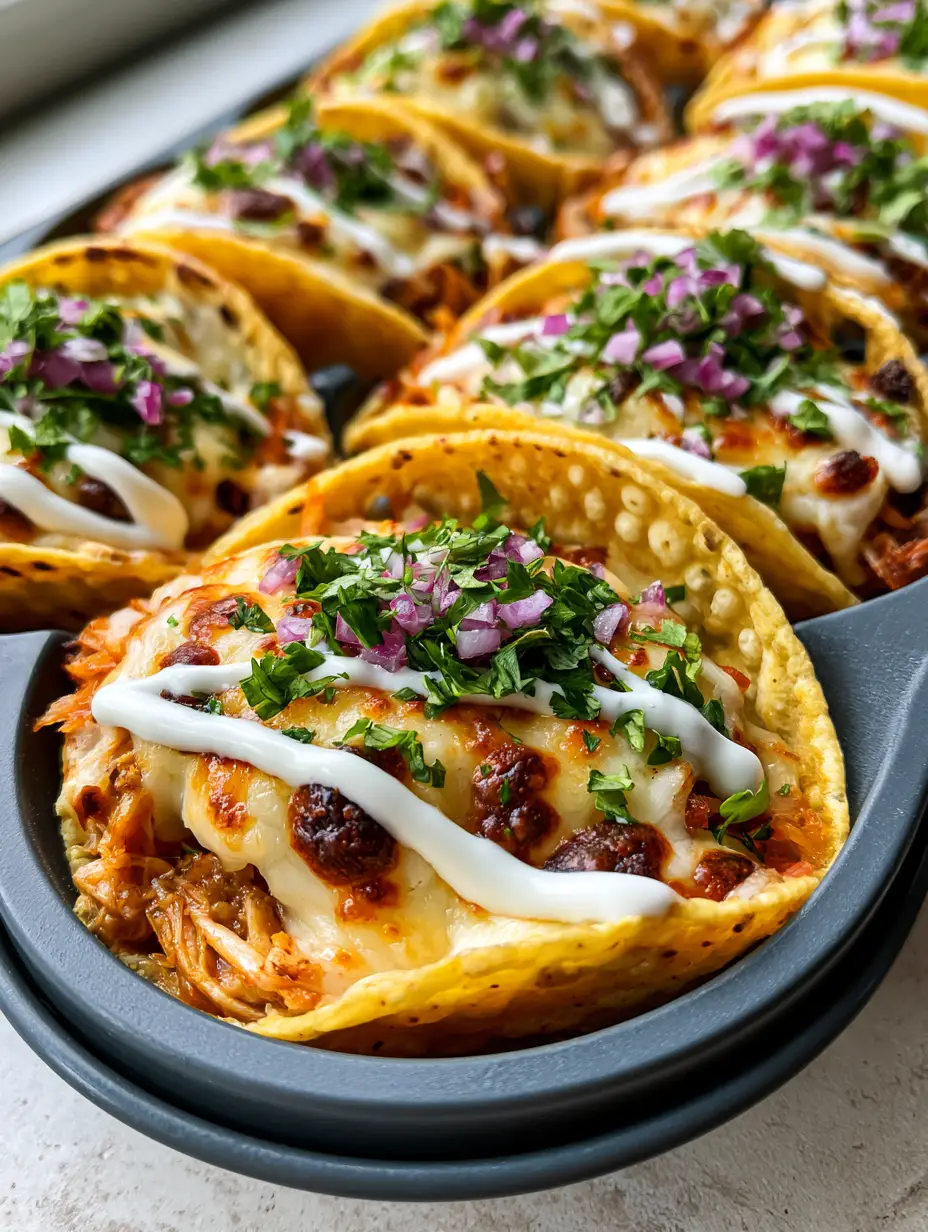
If you are looking for the most satisfying crunch you have ever experienced, these mini baked chicken tacos are the answer to your dinner prayers. Imagine perfectly crispy toasted corn tortillas, held upright in a clever kitchen hack, filled with succulent seasoned chicken and topped with melted pepper jack cheese featuring toasted brown bubbles. This recipe isn’t just about flavor; it is about that glorious, brittle texture that only comes from high-heat baking.
Every bite of these mini baked chicken tacos delivers a symphony of textures, from the snap of the golden-brown shell to the creamy, elegant zigzag drizzle of white lime crema. Whether you are hosting a game day party or just want to upgrade your Tuesday night routine, these tacos are designed to impress both the eyes and the palate. Let’s dive into how to achieve that professional, photo-ready finish right in your own kitchen.
Why These Crunchy Mini Baked Chicken Tacos Rule Your Kitchen
- The Muffin Tin Hack: Using an upside-down dark matte muffin tin ensures your tacos stay upright, allowing the edges to crisp evenly without getting soggy.
- Textural Perfection: We focus on blistered tortillas and charred cheese spots for a professional, restaurant-quality mouthfeel.
- High-Impact Aromatics: The combination of finely minced red onion and vibrant green chopped cilantro provides a fresh contrast to the warm, melted cheese.
- Pinterest-Ready Aesthetic: With the lime crema drizzle and colorful garnishes, these look as good as they taste.
Essential Components for the Perfect Mini Baked Chicken Tacos
To achieve the results seen in our visual blueprint, you need specific ingredients that play well under high heat. Here is what you will need for these mini baked chicken tacos:
Yellow Corn Tortillas: Small, street-taco-sized corn tortillas are essential. They contain less moisture than flour tortillas, which is the secret to achieving those visible air bubbles and a brittle, crunchy texture.
Shredded Chicken Thighs: We recommend 2 cups (approx. 450g) of chicken thighs over breasts. The higher fat content ensures the meat stays succulent and juicy even after being baked in the oven at high temperatures.
Pepper Jack Cheese: You will need 1.5 cups (170g) of shredded pepper jack. The peppers added to the cheese provide a subtle kick, while the high oil content helps create those iconic toasted brown bubbles.
Aromatic Garnish: 1/4 cup (40g) of finely minced red onion and 1/2 cup (15g) of fresh chopped cilantro are added after baking to maintain their vibrant color and crisp bite.
The Crema: A simple mix of sour cream, lime juice, and a pinch of salt creates that thin, elegant zigzag drizzle that ties the whole dish together.
If you love this flavor profile, you might also enjoy our Salsa Verde Chicken Tacos or the smoky depth of Al Pastor Chicken Tacos.
Engineering the Crunch: Step-by-Step Instructions
Preparing the Chicken Filling
Start by seasoning your 2 cups (450g) of shredded chicken. In a large bowl, toss the chicken with 1 tablespoon (15ml) of avocado oil, 1 teaspoon of cumin, 1 teaspoon of smoked paprika, and 1/2 teaspoon of garlic powder. This ensures every strand of chicken is coated in flavor and fat, which prevents it from drying out in the oven. If you have leftovers from a Carnitas Crockpot Recipe, that works beautifully here too.
The Tortilla Softening Trick
To prevent your corn tortillas from cracking when you place them in the muffin tin, you must soften them. Wrap a stack of 12 tortillas in a damp paper towel and microwave for 30-45 seconds. Immediately brush both sides of each tortilla with a light coating of neutral oil. This oil is what creates the blistered, toasted effect once the heat hits them.
Setting Up the Muffin Tin Station
Flip your dark matte muffin tin upside down on a baking sheet. Place each softened tortilla between the humps of the muffin tin, creating a “U” shape. This holds the mini baked chicken tacos perfectly upright. You should be able to fit 12 tacos across a standard 12-cup tin by using the spaces between the wells.
Filling and Achieving the Char
Distribute the seasoned chicken evenly among the shells. Top each taco generously with the shredded pepper jack cheese. Ensure the cheese reaches the edges of the chicken. Bake at 425°F (220°C) for 8-10 minutes. Visual Cue: Watch for the cheese to transition from melted to featuring toasted brown bubbles and the tortilla edges to show visible air bubbles.
The Final Aesthetic Touches
Once removed from the oven, let the tacos sit for 2 minutes to let the shells fully crisp up. While still warm, sprinkle the finely minced red onion and fresh chopped cilantro over the top. Fill a small plastic bag with your lime crema, snip a tiny corner, and apply a thin, elegant zigzag drizzle across the entire row of tacos.
Expert Tips for Pinterest-Worthy Success
- Use Cold Crema: The contrast of the cold lime crema against the hot, crispy toasted corn tortillas is a sensory delight.
- Don’t Overfill: While it’s tempting to pile the chicken high, keeping the filling slightly below the rim of the tortilla allows the cheese to melt over the edges and creates better charred spots.
- The Oil Matters: Use an oil with a high smoke point like avocado or grapeseed oil to get that golden-brown finish without any burnt flavors.
- Freshness is Key: Always mince your red onion as finely as possible; large chunks will overpower the delicate balance of the mini baked chicken tacos.
For more Mexican-inspired dinner ideas, check out our Mexican Street Corn Chicken Tacos or the hearty Mexican Chicken Casserole.
Storage, Reheating & Make-Ahead Tips
While mini baked chicken tacos are best served immediately for maximum crunch, you can store leftovers in an airtight container for up to 2 days. To reheat, avoid the microwave as it will make the corn tortillas rubbery. Instead, place them back in the oven at 375°F (190°C) for 5-7 minutes until the cheese bubbles again.
Pro Tip: You can prep the shredded chicken and the crema up to 24 hours in advance. However, do not assemble the tacos until you are ready to bake, or the tortillas will absorb moisture from the chicken and lose their ability to blister.
What to Serve With Mini Tacos
These tacos are a star on their own, but they pair beautifully with a side of Mexican rice or a crisp slaw. If you are looking for a variety of textures for a party spread, consider serving these alongside our Crispy Poblano Chicken Tacos for a smoky contrast. A side of fresh guacamole or a spicy salsa verde will also complement the richness of the melted pepper jack cheese.
Frequently Asked Questions
They have a mild to medium heat depending on the brand of pepper jack cheese you use. For a kid-friendly version, you can easily swap the pepper jack for a mild Monterey Jack or cheddar.
While you can use flour, corn tortillas are recommended for this specific recipe because they achieve a much higher level of brittleness and ‘snap’ when baked, creating the signature air bubbles seen in the photos.
The secret is moisture and oil. Warming them in a damp paper towel makes them pliable, and brushing them with oil provides the lubrication needed to bend them between the muffin cups without snapping.
A standard silver muffin tin will work, though you may need to bake the tacos for an additional 1-2 minutes to achieve the same golden-brown, toasted finish, as dark pans absorb more heat.
The Official Mini Baked Chicken Tacos Recipe Card
Mini Baked Chicken Tacos: The Ultimate Crispy Muffin Tin Hack
Ingredients
Equipment
Method
- Warm tortillas in damp paper towels for 45 seconds, then brush both sides with oil.
- Flip the muffin tin upside down and wedge tortillas between the cups to form taco shapes.
- Fill with shredded chicken and pepper jack cheese. Bake at 425°F (220°C) for 8-10 minutes until edges are brittle and cheese has toasted brown bubbles.
- Top with minced red onion, cilantro, and a zigzag drizzle of lime crema.
Notes
Ensure the red onion is minced as finely as possible for the best visual appeal and flavor balance.
Join the Table!
If you made these mini baked chicken tacos, I want to see your results! Did you get those perfect toasted brown bubbles on your cheese? Please save this recipe to your Pinterest boards so you never lose it, and follow Emily_Table for more viral kitchen hacks. Don’t forget to leave a 5-star rating in the recipe card above and drop a photo of your creation in the comments below!