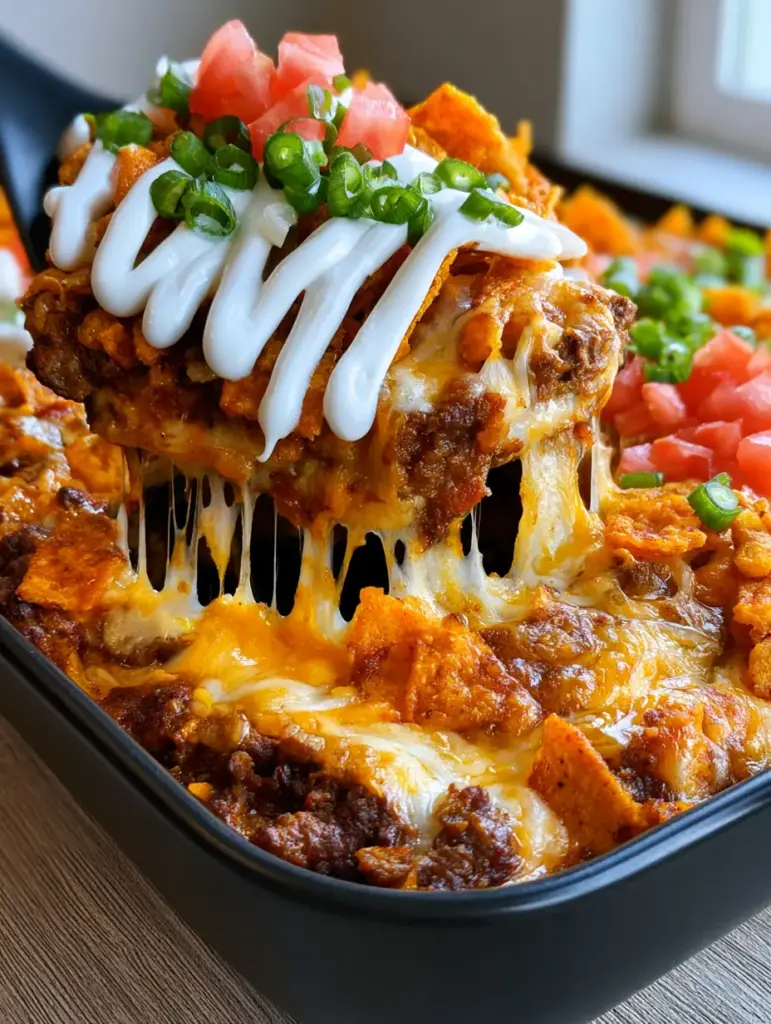
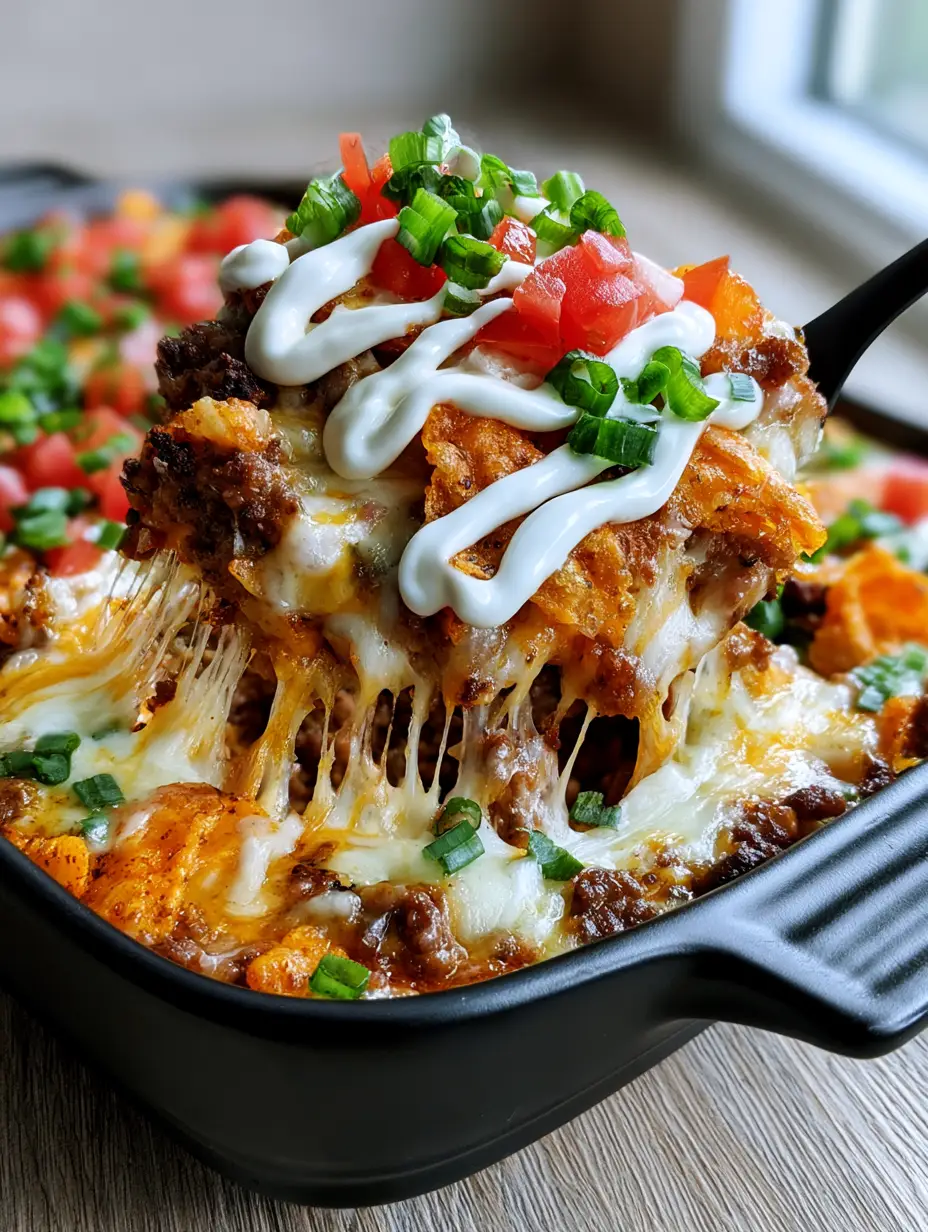
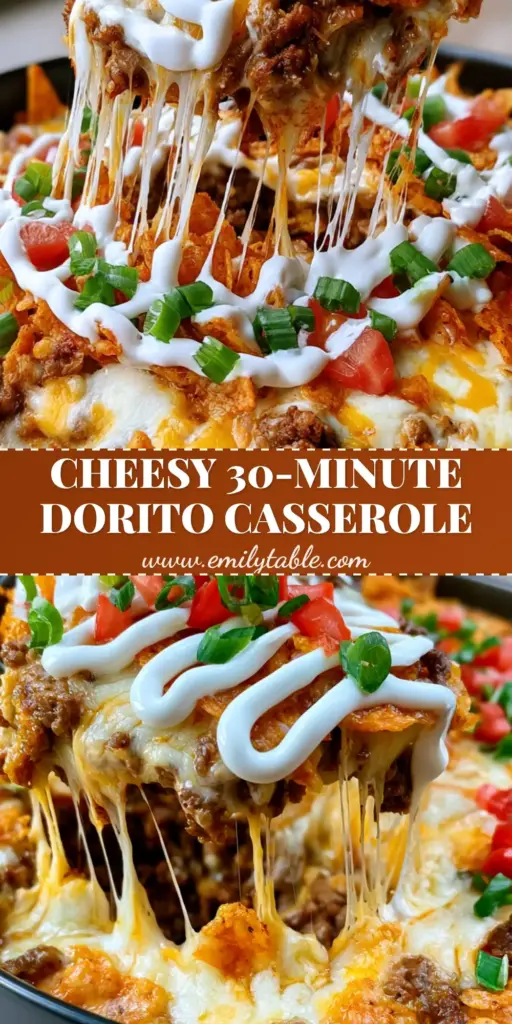
There is nothing quite as satisfying as the sound of a fork breaking through a layer of jagged, crunchy nacho cheese tortilla chips into a bed of bubbling, melted cheese. This Mexican Dorito Casserole is a masterclass in texture, combining the savory depth of perfectly browned seasoned ground beef with the dramatic, stringy cheese pull of sharp cheddar and Monterey Jack.
Every scoop of this dish reveals layers of bold flavor, punctuated by the vibrant freshness of finely diced red roma tomatoes and a precise zigzag drizzle of cool sour cream. Whether you are hosting a game day crowd or looking for a weeknight dinner that will have everyone asking for seconds, this recipe delivers a visual and culinary feast.
Designed to be baked in a modern matte black ceramic dish for that perfect heat distribution, this casserole achieves those coveted golden-browned cheese edges that every home cook dreams of. Let’s dive into how you can recreate this smartphone-photo-ready masterpiece in your own kitchen.
Why This Zesty Ground Beef Bake is a Crowd Favorite
- The Ultimate Cheese Pull: By blending high-fat sharp cheddar with creamy Monterey Jack, we achieve a professional-grade stretch that looks as good as it tastes.
- Dynamic Textures: You get the contrast between the tender, seasoned beef and the jagged, crunchy orange nacho cheese tortilla chip shards embedded in the top.
- Fresh Garnish Balance: The heavy, savory base is perfectly offset by sliced fresh green onions, vibrant cilantro, and bright red tomatoes.
- One-Pan Simplicity: Aside from browning the meat, the oven does all the heavy lifting, making this a low-stress, high-reward meal.
- Visually Stunning: The contrast of the white sour cream drizzle against the orange chips and green scallions makes this dish a true centerpiece.
Essential Elements for the Perfect Mexican Dorito Casserole
Lean Ground Beef (80/20): We use 1.5 lbs (680g) of ground beef to ensure a rich flavor profile while providing enough fat to keep the meat succulent during the baking process. Ensure you drain the excess rendered fat to prevent the bottom layer of chips from becoming overly greasy.
Nacho Cheese Doritos: You will need 1 large bag (approx. 9.25 oz / 262g) of chips. Half are crushed to provide a structural base, while the remaining jagged shards are pressed into the top to maintain that signature crunch.
The Dual-Cheese Blanket: We utilize 2 cups (226g) of sharp cheddar for its bold, tangy bite and 2 cups (226g) of Monterey Jack for its superior melting capabilities. Grating your cheese from a block rather than using pre-shredded bags ensures a much smoother, stringier melt without the grainy cellulose coating.
Aromatic Base & Seasoning: A combination of yellow onion, fresh garlic, and a robust taco seasoning blend provides the aromatic foundation. This ensures the beef layer isn’t just salty, but deeply flavorful and fragrant.
The “Fresh” Toppers: 3 medium roma tomatoes (approx. 150g) and 4 green onions (30g) provide the essential acidity and “snap” required to cut through the richness of the dairy. Never skip the fresh cilantro, as its citrusy notes tie the entire Tex-Mex profile together.
Foundational Liquid Binder: A small amount of tomato sauce or salsa is used within the beef mixture. This provides the “invisible” moisture needed to keep the meat from drying out during its time in the oven.
Kitchen Tools Required for Culinary Success
To achieve the professional results seen in our visual blueprint, you will need a large 12-inch (30cm) cast iron or stainless steel skillet for browning the meat. A heavy-bottomed pan allows for superior Maillard reaction, giving the beef those dark, flavorful crispy bits.
For the baking vessel, a 9×13 inch (23x33cm) ceramic baking dish is ideal. If you want to match our aesthetic exactly, a matte black ceramic dish provides a stunning contrast to the bright orange and red hues of the casserole. You will also need a sharp chef’s knife for the precise dicing of the roma tomatoes and scallions.
Step-by-Step Instructions for the Perfect Layered Crunch
Perfectly Browning the Seasoned Beef
Start by heating a drizzle of neutral oil in your skillet over medium-high heat. Add the ground beef and cook without moving it for 2-3 minutes to develop a deep brown crust, which is essential for a savory depth of flavor.
Break the meat apart into small crumbles and add your finely diced onions. Sauté until the onions are translucent and the beef is fully cooked through. Stir in your taco seasoning and a splash of water or tomato sauce, allowing it to simmer for 3-5 minutes until the mixture is thick and glossy.
Building the Foundation and the Crunch
Lightly grease your baking dish. Create a base layer using about half of your Doritos, lightly crushing them in your hands as you spread them out. This creates a “crust” that will absorb some of the savory juices from the beef.
Spread the seasoned beef mixture evenly over the chips. Follow this with a thin layer of the mixed cheddar and Monterey Jack cheese. This “middle” cheese layer acts as the glue that holds the structural integrity of the scoop together.
The Final Blanket and the Jagged Top
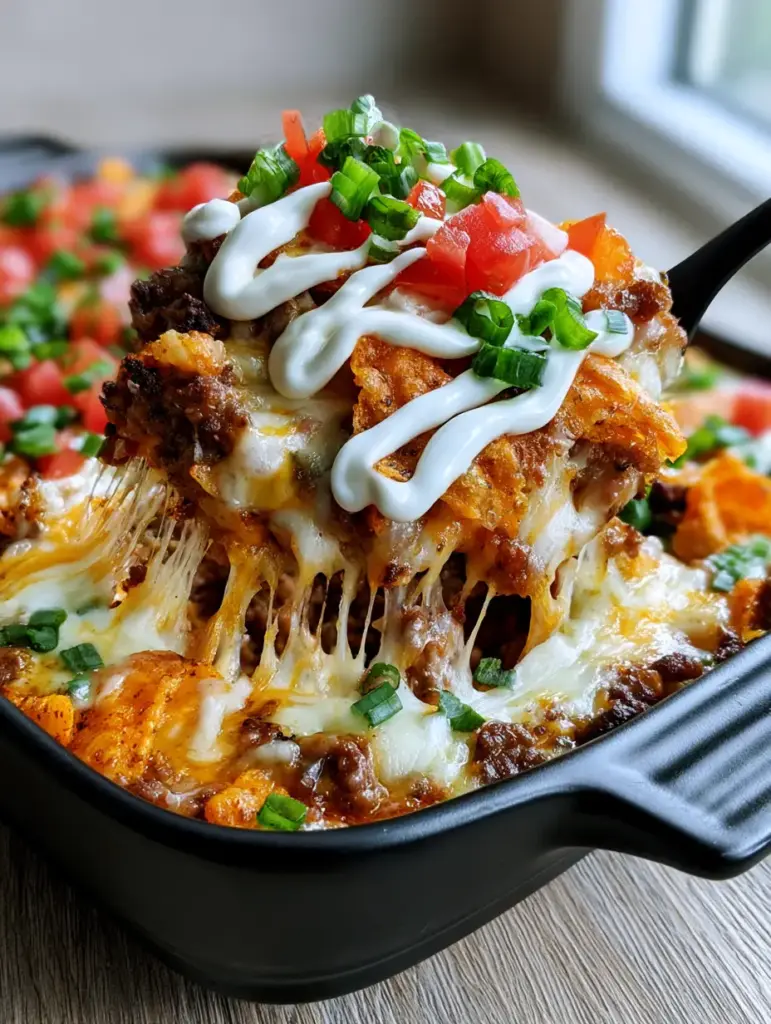
Top the beef with the remaining chips, but this time, keep the shards larger and more “jagged.” Press them slightly into the beef so they stay upright. Generously cover the entire surface with the remaining 3 cups of cheese, ensuring you reach the very edges of the dish.
Bake in a preheated oven at 375°F (190°C) for 15-20 minutes. You are looking for the “Visual Cue” of the cheese bubbling in the center and the edges turning a beautiful golden-brown. The chip shards sticking out should be toasted but not burnt.
Expert Tips for a Professional-Grade Casserole
- Preventing Soggy Chips: Always drain your beef thoroughly after browning. If the meat mixture is too watery, the bottom layer of chips will turn to mush rather than staying tender-crisp.
- The Drizzle Technique: To get that perfect “zigzag” of sour cream, place the sour cream in a small plastic sandwich bag and snip off a tiny corner. This allows for much more control than using a spoon.
- Temperature Matters: Let the casserole rest for 5 minutes after taking it out of the oven. This allows the cheese to set slightly, which actually improves the “stringiness” of the cheese pull when you lift the first scoop.
- Freshness Timing: Only add the tomatoes, green onions, and cilantro immediately before serving. This prevents the cold toppings from wilting or making the top layer of cheese “sweat.”
Storage, Reheating, and Make-Ahead Advice
If you have leftovers, store them in an airtight container in the refrigerator for up to 3 days. Note that the chips will naturally soften over time as they sit against the moisture of the beef and cheese.
For reheating, avoid the microwave if possible, as it will make the chips rubbery. Instead, place a portion in a small oven-safe dish and heat at 350°F (175°C) for 10 minutes. This helps re-crisp the top layer of Dorito shards.
We do not recommend freezing this specific casserole once assembled, as the texture of the chips and sour cream drizzle does not hold up well to the freezing and thawing process. However, you can easily freeze the cooked and seasoned beef mixture for up to 3 months to save time on future meal prep.
What to Serve with Your Mexican Dorito Casserole
This dish is incredibly rich and savory, so it pairs beautifully with side dishes that offer a bright, acidic contrast. A crisp green salad with a lime-cilantro vinaigrette is an excellent choice.
If you are looking for a fuller Tex-Mex spread, consider serving this alongside a refreshing Mexican shrimp cocktail or a bowl of street corn pasta salad. If you’re a fan of layered tortilla dishes, you might also enjoy comparing this to a classic copycat Mexican pizza. For those who love the spice profile but want a different carb base, our pepper jack chicken pasta offers a similar cheesy heat.
Common Questions About This Recipe
Absolutely! Black beans or fire-roasted corn make excellent additions to the beef layer. Just ensure they are well-drained before adding them to the skillet to prevent excess moisture.
You can prepare the seasoned beef mixture up to 2 days in advance. However, do not assemble the chips and cheese until you are ready to bake, or the chips will absorb moisture and lose their texture.
The secret is two-fold: thoroughly drain the rendered fat from the ground beef after browning, and use a layer of lightly crushed chips at the bottom to act as a structural base while keeping the top shards whole for maximum crunch.
As written, it has a mild-to-medium heat depending on your taco seasoning. To make it spicier, use ‘Spicy Nacho’ Doritos and add diced jalapeños to the beef mixture.
A 50/50 blend of Monterey Jack and Sharp Cheddar is ideal. Monterey Jack provides the elasticity and ‘stretch,’ while the Sharp Cheddar provides the essential color and bold flavor.
The Complete Mexican Dorito Casserole Recipe
Mexican Dorito Casserole: The Ultimate Cheesy Taco Bake with a Crunch
Ingredients
Equipment
Method
- In a 12-inch skillet over medium-high heat, brown the ground beef until a deep golden crust forms. Break into crumbles.
- Add diced onions and garlic. Sauté for 3-4 minutes until onions are translucent and fragrant.
- Stir in taco seasoning and tomato sauce. Simmer for 5 minutes until thickened. Drain any excess fat.
- Crush half of the Doritos into the bottom of a greased 9x13 baking dish.
- Spread the beef mixture over the chips, followed by 1 cup of the cheese blend.
- Add the remaining Dorito shards (keeping some jagged) and cover with the remaining 3 cups of cheese.
- Bake at 375°F (190°C) for 15-20 minutes until the cheese is bubbling and the edges are golden-brown.
- Remove from oven, let rest for 5 minutes. Drizzle with sour cream in a zigzag pattern and scatter with tomatoes, green onions, and cilantro.
Notes
Use block cheese and shred it yourself for the best possible cheese pull texture.
Join the Table and Share Your Creations!
The Mexican Dorito Casserole is more than just a meal; it’s a sensory experience that brings the family together. We would love to see how your cheese pull turned out! Did you use the matte black dish, or perhaps added a few jalapeños for extra heat?
Leave a comment below with your results or any substitutions you tried. Don’t forget to sign up for our newsletter to get more elite-level recipes delivered straight to your inbox. If you loved this visual guide, please share this recipe to Pinterest so others can enjoy the crunch!